Showing posts with label handmade. Show all posts
Thursday, August 15, 2013

I can still recall our last summer


swimsuit//Urban Outfitters    skirt//Handmade by me    sunglasses//Asos

swimsuit//thrifted    shorts//DIY    belt//thrifted with trousers
dress//thrifted    jelly shoes//thrifted    sunglasses//Asos
A great big bunch of pictures from last summer that I neglected to upload at the time. So now it's all here in one big photo dump. I hope you find yourself immersed in the images; tropical heat and salty sea air, rainstorms and colourful cocktails. We stayed in Indonesia, on a small island near Singapore, where I explored all there was to be had, from windsurfing to elephant riding. (The windsurfing was rather fruitless as the bay is well protected and there is hardly a breeze, unless a storm is brewing, in which case one is advised to stay out of the water entirely.)

I would also like to thank you for the wonderful response to my last post, I feel much more secure knowing that others share the same views and that I won't alienate my readers by exposing hair in the 'wrong' places.
Tuesday, July 30, 2013

I was carried to Ohio in a swarm of bees

When I was very young we had a massive garden, or it felt massive at the time, to my 4-year-old self. It had a big old tree in the middle of the sloping lawn and the wild strawberries that grew by the fence. I don't remember much, but I do recall climbing the tree beside the house after dark, getting covered in sap and then crying because I couldn't get down on my own. That was the last time I had a garden. Recently, after I graduated from high school, my parents moved back into a house with a garden and every time I'm back home I love to spend time in it. No massive trees but plenty of birds and bees and things to look at.

This outfit is probably much simpler (just a nice way of saying plainer) than most that I post here. But with the heatwave simple is best otherwise I run the risk of ending up as a sweaty mess sprawled on the tiles trying to cool down (I do that anyway, but that's beside the point). I also made a small capsule wardrobe for the 4 weeks I'm away so I toned down the statement pieces and chose easier-to-match staples.

The shorts are a pair I made from fabric I picked up from a charity shop and the pattern was drafted by following the the pattern of another pair of shorts that I picked up. The fit was so perfect that I had to copy the hip to waist fit and the dart placement. Overall I made them a little more high waisted (never too high) and longer on the leg. I'd make a few slight changes to the pattern; lower the back, straighten out the front, and put a little more room in the butt area of the crotch curve.
shorts//handmade    top//People Tree    shoes//thrifted
Friday, May 3, 2013

Hair like candy floss

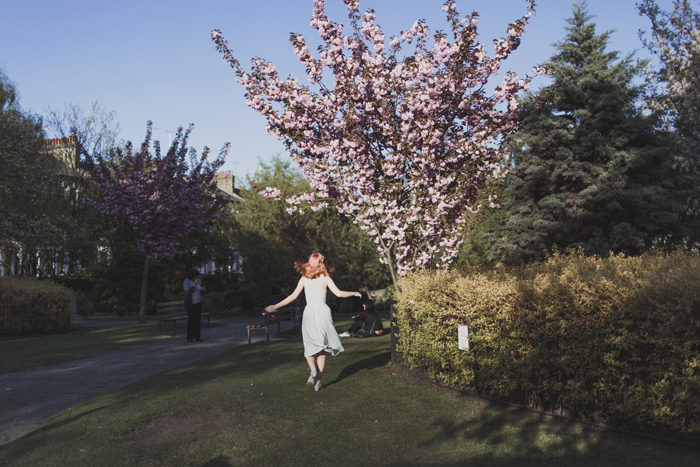
Last Friday, as I was browsing the hair dyes in Boots, with the intention of buying the brightest orange, some peachy blonde caught my eye. After only a short moment comparing several bleaches, I bought the strongest packet from Live Colour XXL. I only needed a few words of encouragement from my flatmates before I decided to take the plunge to go blonde. I also took inspiration from some lovely pink haired ladies including Kailey of MermaidensMarianne of Esme and the LanwayHannah of Hannah and Landon, and Charlotte Free. It turned out I needed two packets of bleach, which is lucky because I bought a second from the supermarket just in case. Then I smothered my hair in Manic Panic (in hot hot pink, I think) super diluted with conditioner, which turned out a little too fuchsia on the fringe and quite salmon on the rest of my hair. Shampooing has since evened it all out (thank goodness!) Once the pink fades out I'll probably bleach it again to catch the few sneaky bits that have remained darker than the rest and try a new bubblegum pink. In conclusion, the pink is here to stay, for some time at least. Don't ask why because I don't really know, it feels like it was a moment of madness, but I haven't regretted it yet.

The weather is on the up again in London, the sunshine really lifts the spirits. I switched my winter wardrobe for my summer wardrobe and I now have a collection of adorable summer dresses that I've been slowly accumulating all winter. This is one I thrifted, it's vintage Monsoon and would be perfect for picnics. It's also the colour of sea foam so I wore my shell bag with it (another second hand find). I can't decide whether I want to be a mermaid or a princess but I'm happy to settle for both. Splashing in the waves in the light of a setting summer sun, I would be the happiest mermaid princess...

dress and bag//thrifted from oxfam    headband//handmade    shoes//second hand from ebay
Thursday, January 24, 2013

Tutorial: Knee Patch Tights


Labs have started up again which means I have fewer days to get photos and sometimes on those days I'm so tired I'd rather stay in bed all day. Instead I bring you posts in the form of tutorials and other things I can photograph at home. First up is this; a tutorial for making knee patch tights. It's simple and quite cute, I've seen them for sale but they're much too expensive for my budget. Besides, why buy when you could DIY? I'll admit, these didn't turn out as well as expected. I should have stitched the edges before attaching them to the tights to prevent fraying. On top of all that I sewed them with my knees bent so they look a little silly when I stand up. At least I know for next time and I can share these tips with you! Next up on my list I might re-make my circle skirt tutorial with decent photos and full instructions, keep an eye out for it!
Materials

*A pair of tights
*Some fabric
*Needle and thread

Let's begin with the basics, the tights. They should be a high denier or, even better, made with cotton or wool so that holes don't lead to laddering. They also need to be quite close knit so that anything sewn on stays in place. For fabric you can choose almost anything. Stretch fabrics will work well because they'll take on the shape of you knees but they might fray more easily. This would look great with some leather-look vinyl or lace.
One

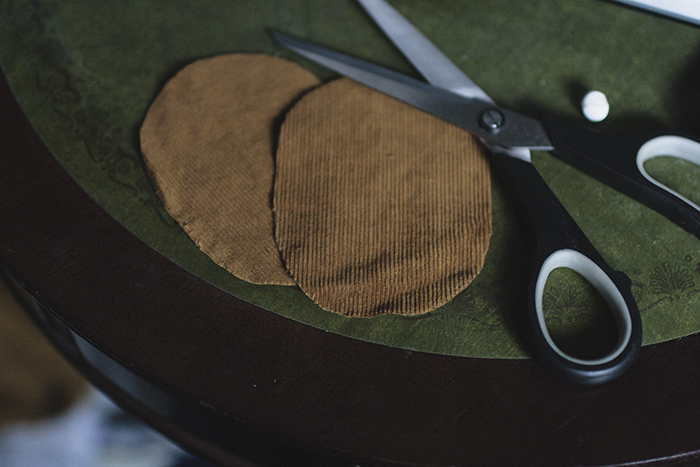
First you'll want to make the patches. To do this, get a piece of paper and sketch out a rough oval shape that fits the size of your knee. Then fold that paper in half and then in half again and cut along the line you've drawn. This will help obtain a smooth curve. Unfold the paper and make sure it looks about even. Then trace the shape onto some fabric and cut out the shapes.

If you're working with a thin fabric that might fray you can cut out four patches and sew them almost all the way around (right sides together) in pairs. Then turn those inside out and sew them onto the tights. That way there are no exposed edges. You can also use a blanket stitch or some form of stitch around the outside to stop the edges fraying.

Two

Sewing on the patches. First you'll want to baste the patches onto the area you'd like them to be, do this while wearing the tights.

Then, take off the tights and go around the edges and use small stitches to attach the patches to the tights. I used an overcast stitch which prevents fraying and I attached the patches at the same time, killing two metaphorical birds with a single length of thread. Remember to remove basting afterwards (which I didn't do for these photos).
 
© Copyright 2011 FasHion sToRe All Rights Reserved.
Free Templates by Cool Blogger Tutorials- Powered by Blogger.com.